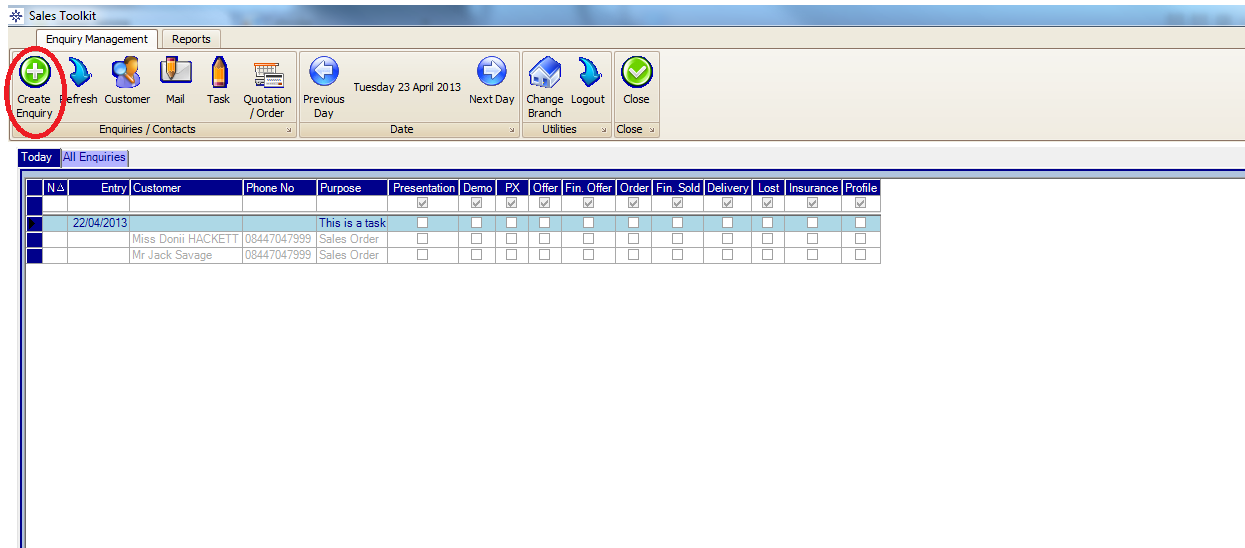
To create an enquiry select the Create Enquiry button on the Sales Toolkit window. Image shown below:

This will prompt you to do a customer search. For more information on customer search please click here.
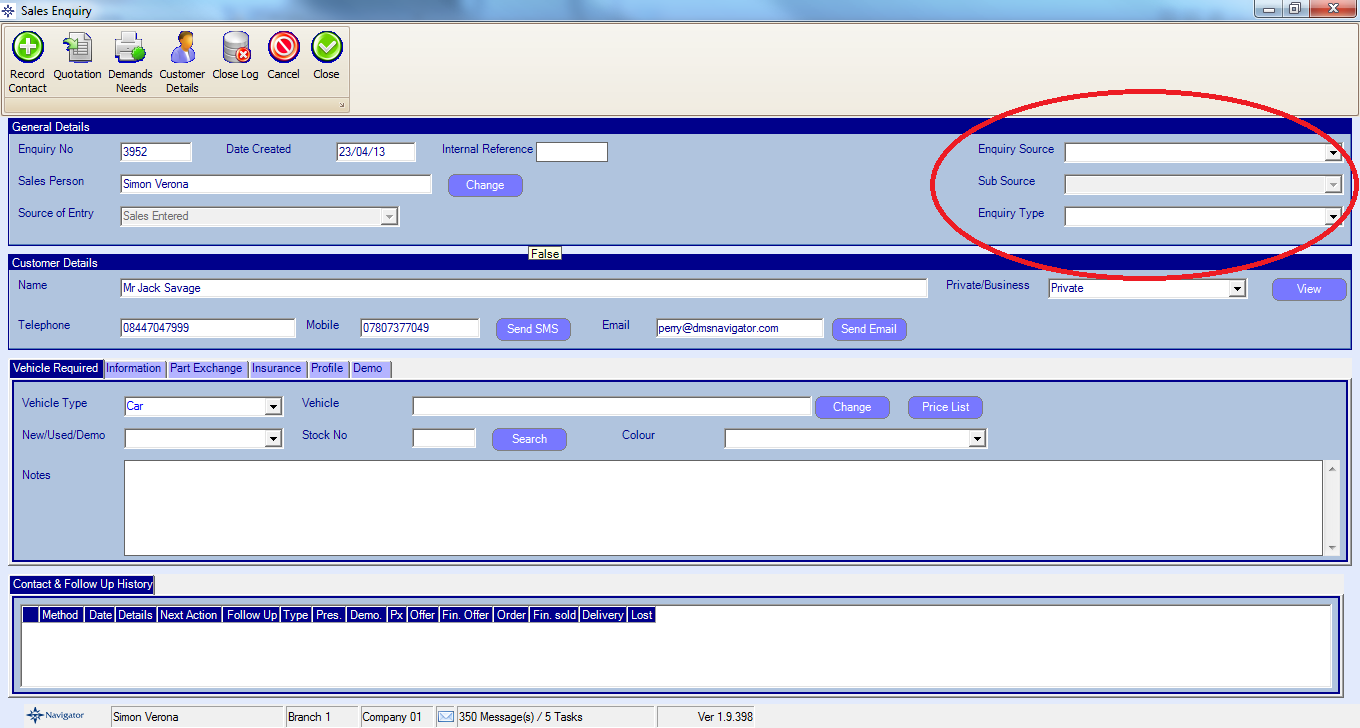
Select the required customer and it will bring the Sales Enquiry window up on screen. As shown below:

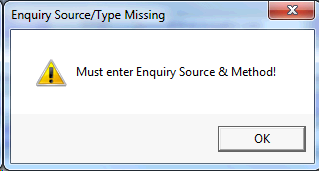
Note: To save an enquiry you need to make sure that you fill in the Enquiry Source and Enquiry Type (Options circled in red on the above image) otherwise you will not be able to Close Log/Close the enquiry. If you do not fill in the relevant details the below message will appear:

On the Sales Enquiry you have four different sections. These are the following:
The general details section simply shows you the enquiry number, date created, sales persons name (with the ability to change it) and the source of Entry. |
The customer details section shows you the customers name, telephone number, mobile number and email address. You can also review the customers record by selecting the Review button. This section also gives you the ability to text or email the customer. You can only do this if you have the text and email facility setup. If not, and you would like to use these facilities please contact your Account Manager. |
The vehicle required section allows you to select a vehicle from either the stock list or price list that the customer is interested in. Can can also amend the vehicle details by selecting the Change button. You can also add the vehicle that the customer is interested in part exchanging by selecting the Part Exchange tab. Enter the required vehicle details and select the lookup button. This will automatically bring back the vehicle details. You can also do a glass and cap valuation by selecting the Full Appraisal button then select the Valuation tab. The Full Appraisal also gives you the ability to enter more details about the part exchange. |
For more information about this section please review the Record Customer Contact section of the Help and Manual. |